Overview

Ajoutez cette extension à votre panier et bénéficiez d'une promotion de -20% jusqu'au 31 Octobre avec le code promo 2019SAVE20
The RMA Extension manages Return Merchandise Authorization and is a very useful add-on for your Magento 2 website.
It assists your customer in requesting a return, which helps to improve customer experience and satisfaction. It is quick and convenient for the Retail or B2B customer.
Boost My Shop extending its expertise in the business of e-commerce for the benefit of functional tools, reliable and cheap.
You can set up various Return Procedures that adapt to your Retail Business policies and help customers request a return.
Specifications
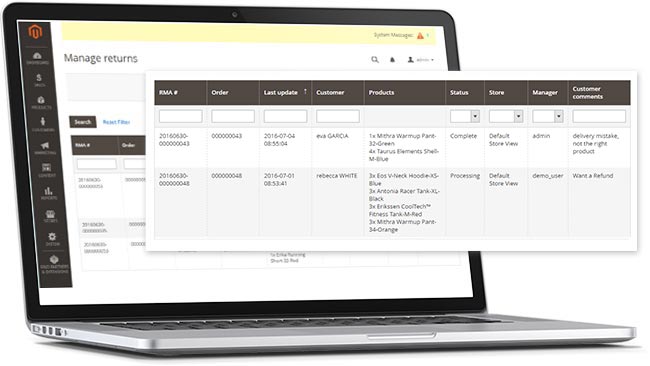
The Magento 2 RMA Extension gives you an overview of the RMA activity for your Website.
Create RMA
Magento 2 RMA offers Multiple RMA Creation Entry points from the Back End.
• Go in sales > Manage returns, click on button “Create RMA for order” and in the next screen, select the order to return
An alternative option for creating a new RMA is from the customer order page.
• Go in the order to return, select the “RMA” tab and click on button “Create order”
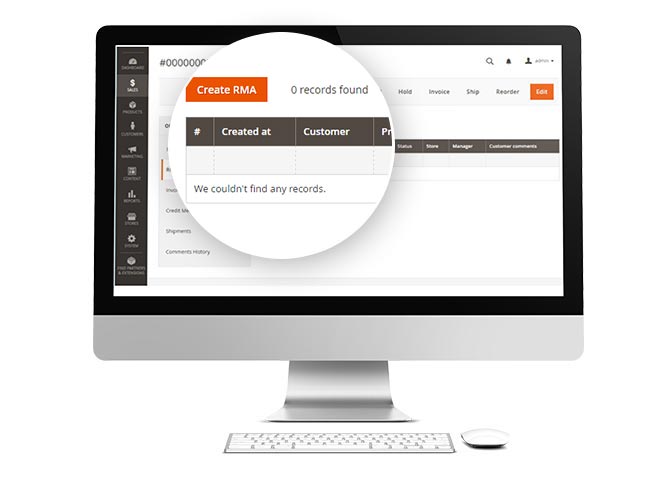
Product Advantage: The entire order history is published in one location.
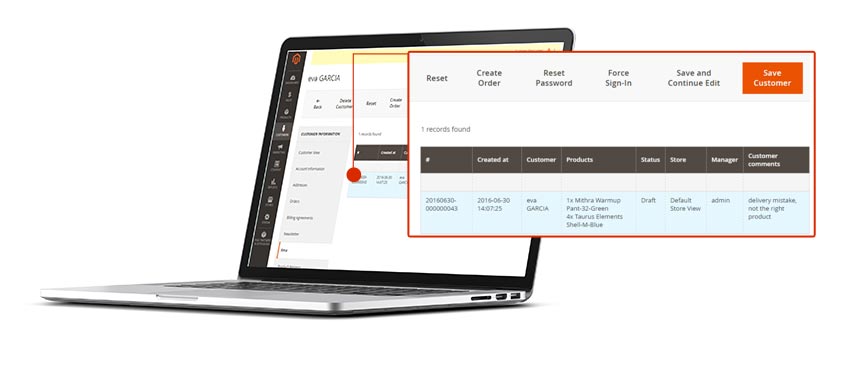
From the customer account page, you have a consolidated view of all the RMAs requested per customer ID.
Manage RMA
Once you are in an RMA, you can manage it using the different statuses:
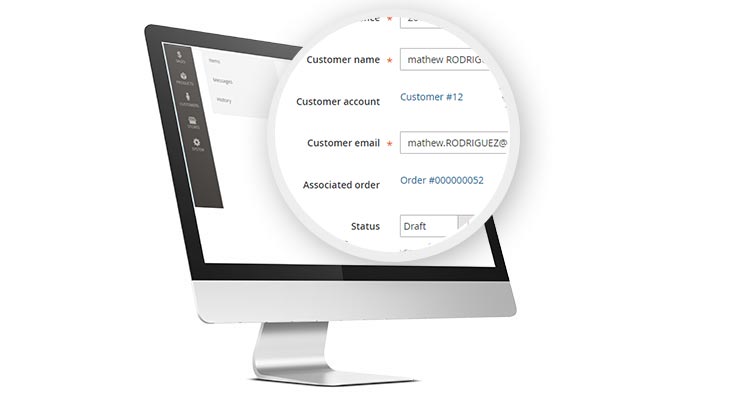
• Draft : You are creating the RMA, but it is not yet visible for customer.
• Requested : The customer has sent a return request and it is pending admin approval.
• Accepted : You have accepted the return and the customer must print the return form (from their customer account or using the link in the email sent).
• Processing : You have received the products and are preparing to process them.
• Complete : You have processed the RMA (and all refunds).
Special Tips: if you enabled option stores > configuration > Boostmyshop > rma > customer notification > Automatic customer notification on RMA status change, the customer will receive an email each time the RMA status changes.
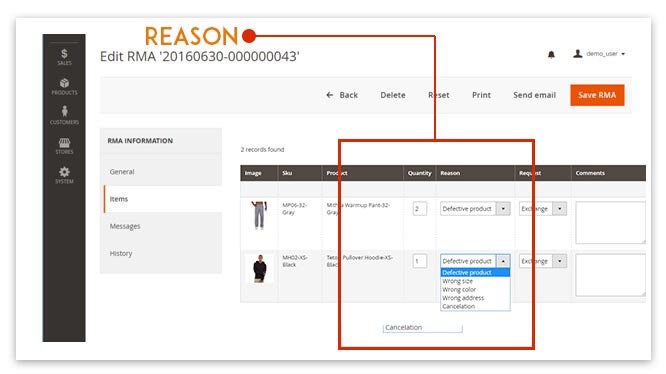
In the “Items” tab, you can view the list of products associated with the RMA in question. There, you can edit the quantity to return, the reason, and the request and comment fields.
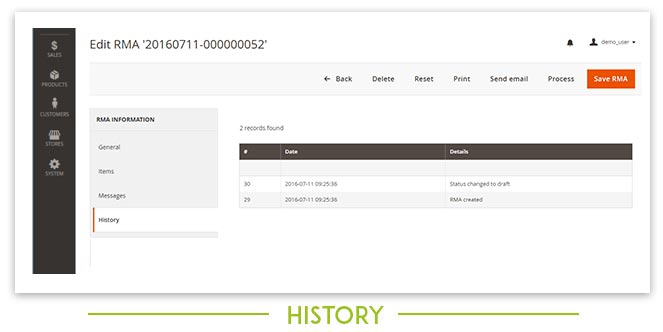
The “History” tab lists every event related to the RMA. An entry is added when:
• The RMA Status changes
• The Customer or Admin is notified
• A product is refunded or returned to stock
Return form
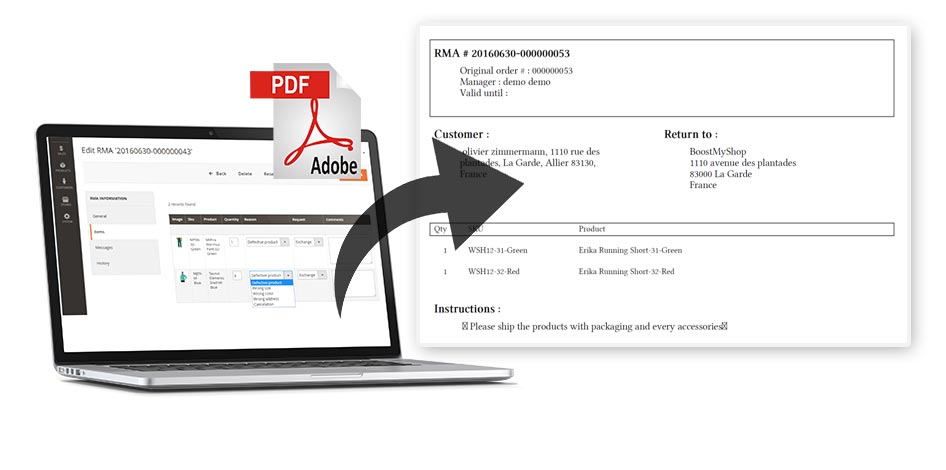
Both the admin and the customer can download and print the return form. Typically, the customer will be required print the return form and include it in the shipment with the returned products.
You can customize several features in the return form PDF:
* Logo: Your company logo can be added via: stores > configuration > sales > sales > invoice and packing slip design > Logo for PDF print out
* Returning address: Configurable via: stores > configuration > Boostmyshop > RMA > general > return address
* Instructions: The text displayed after the product list on the PDF. Your customized instructions can be added via: stores > configuration > boostmyshop > rma > general > instructions.
Messages
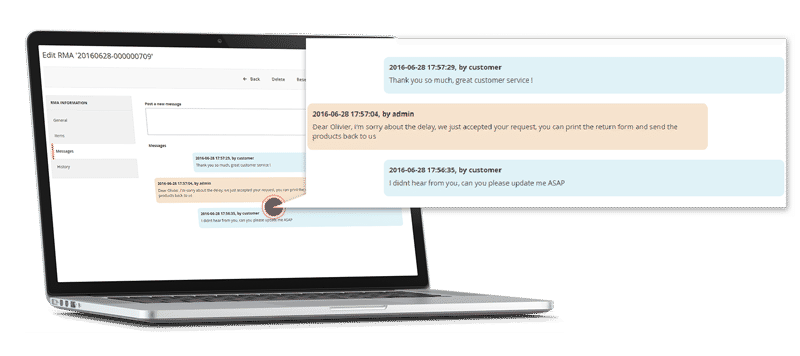
You can exchange messages with your customer using the “Messages” tab.
When you create a new message, a notification email is sent to the customer and your message is added to the thread.
Customers can reply directly from their customer account.
Process RMA
This is the final step for an RMA. In order to process an RMA, simply click on the “Process” button!
A new page is displayed where you can select the different actions to be performed:
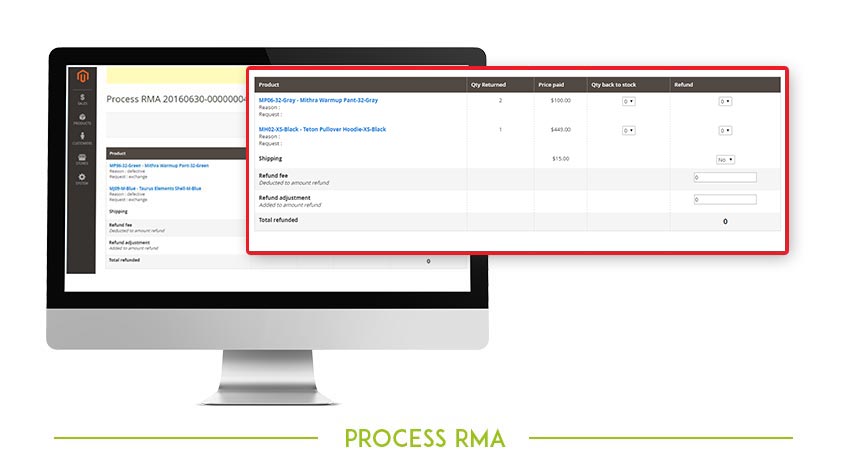
• For each product, you can decide the quantity to put back in stock, and the quantity to refund.
Note : You cannot refund a product if it has NOT been invoiced.
• Shipping: You can choose to refund shipping fees using the “Yes / No” drop down menu.
• Refund Fee / Refund Adjustment: Change the amount refunded using the adjustment text boxes: “Refund fee” and “Refund adjustment.”
Every time you change a refund option, the Total refunded is updated in the “Total refunded” field.
Once the above steps are complete, you can click on the “Complete RMA” button to perform the selected actions.
The RMA status will change to “Complete” and the customer will receive a notification email.
With Embedded ERP:
The extension Embedded ERP Magento 2 associated with RMA allows you to follow each product reservation in the inventory management tab: in one click, find all orders produced from an RMA purchase or return.
The Embedded ERP organizer adds the possibility to communicate with its teams (after sales, deliveries, sales ...) concerning product returns
Nouvelles versions
Release 1.0.52 - Décembre 2021
Release 1.0.46 - Juillet 2021
Release 1.0.31 - Décembre 2019
Release 1.0.25 - Mai 2019
Release 1.0.22 - Mai 2018
Release 1.0.20 - Février 2018
Commentaires
Good Plugin for Magento 2.X
by Sunil Bajaj
We are using this magento Plugin on our website https://www.mygetwellstore.com it fantastic and very easy to use and configure. It works with other plugins too.


